Overview
Teaching: 0 min Exercises: 20 minQuestions
Objectives
Deploy a Django web framework on AWS Elastic Beanstalk
Learn how to use a Python IDE to build your web app
WE MAY NOT ALL BE ABLE TO DEPLOY THIS APP SINCE WE ALL BELONG TO THE SAME SUBSCRIPTION. DEPLOYMENTS TO THE SAME RESOURCE GROUP MAY TAKE A LONG TIME
Prerequisites
- Azure CLI you can mostly just use pip install azure-cli (More installation tips here: https://docs.microsoft.com/en-us/cli/azure/install-azure-cli)
Provisioning an Azure Web App
Adapted from https://docs.microsoft.com/en-us/azure/app-service-web/web-sites-python-create-deploy-django-app
The first step in creating your app is to create the web app via the Azure Portal.
Log into the Azure Portal and click the NEW button in the bottom left corner.
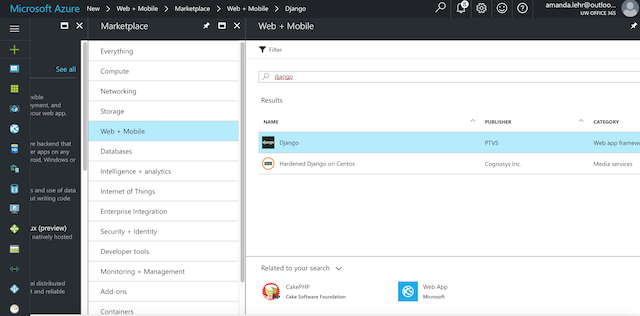
In the search box, type “python”.
In the search results, select Django (published by PTVS), then click Create.
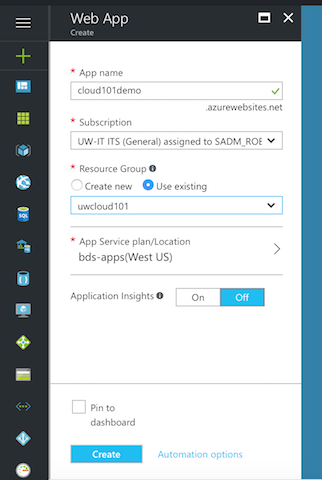
Configure the new Django app, such as creating a new App Service plan and a new resource group for it. Then, click Create.
Configure Git publishing for your newly created web app by following the instructions at Local Git Deployment to Azure App Service.
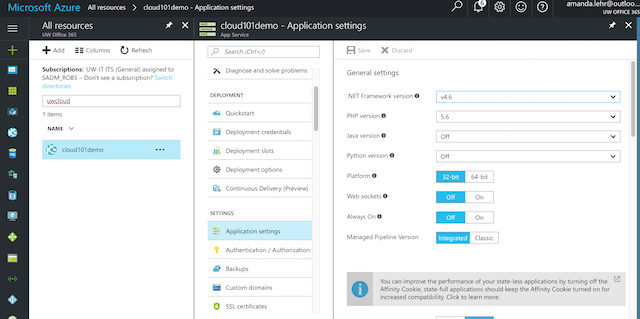
Once the app is deployed, you should be able to see it on your dashboard; otherwise, go to All Resources and search for your App Name. In your App, select Application Settings and change Always On to “On”. Click “Save”.
Modifying your Django code
In Pycharm, you need to just install the azure management package. Again in the terminal in Pycharm:
pip install azure
``` pip freeze > requirements.txt
To connect to blob storage, you add this snippet to your settings.py which is the name of your Blob Storage account that stores all your files and the associated account key.
AZ_ACCOUNT_NAME = ‘araldrift’ AZ_ACCOUNT_KEY = ‘’
Then, in api.py, add to the top:
from azure.storage.blob import BlobService
Then comment out all the previous Google Cloud and AWS Beanstalk references and add:
blob_service = BlobService(account_name=settings.AZ_ACCOUNT_NAME, account_key=settings.AZ_ACCOUNT_KEY)
blob_service.get_blob_to_path(‘flow’, infile, filename)
Note that 'flow' here is the name of my folder inside my blob storage

Again, you can Run your Django server on Pycharm to check that your App is connected to your Azure Blob Storage.

## Deploying your app from your local git repository
Install the Azure CLI using pip install azure-cli

From your Terminal or bash shell and inside your webapp folder, run the following command to generate the site deployment files:

```bash
$ azure config mode asm
$ azure site deploymentscript --python

The command would have generated a file called deploy.cmd
We need to edit it to replace these lines:
deploy.cmd


echo Upgrade pip package.
env\scripts\python -m pip install pip --upgrade
IF !ERRORLEVEL! NEQ 0 goto error
echo Pip install requirements.
env\scripts\pip install -r requirements.txt
We are also going to create a .skipDjango file to avoid having to collect all our static files - which we don’t have anyway.
touch .skipDjango
Now you just have to commit your code, and push it to azure. To find your Azure git repo, go to your Apps blade > Overview and select the “git clone url”. It should look something like this:
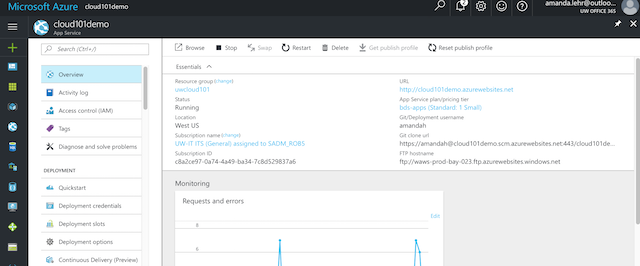
https://amandah@cloud101demo.scm.azurewebsites.net:443/cloud101demo.git
In your local app folder,
$ git add .
$ git commit -am "Deploy to Azure"
$ git remote add azure https://amandah@cloud101demo.scm.azurewebsites.net:443/cloud101demo.git
$ git push azure master
That’s it!
Key Points