Overview
Teaching: 0 min Exercises: 15 minQuestions
I’ve built my webapp, now what?
Objectives
Learn to deploy a webapp to AWS Elastic Beanstalk
…Continued from Part 3
Deploying your app to Elastic Beanstalk using Pycharm
Make sure you have the Pycharm AWS Beanstalk Plugin installed.
Plugin Installation
Adapted from IntelliJ Intellij IDEA: AWS Elastic Beanstalk Integration from Viatra Documentation
Go to “File”>”Settings”>”Plugins” window and press “Browse repositories”, repository browser window will open
Find “AWS Elastic Beanstalk Integration” plugin, make a right mouse button click and select “Download and Install” option in the context menu, press “Yes” in popup dialog
Close “Settings” window and restart IntelliJ IDEA to apply changes
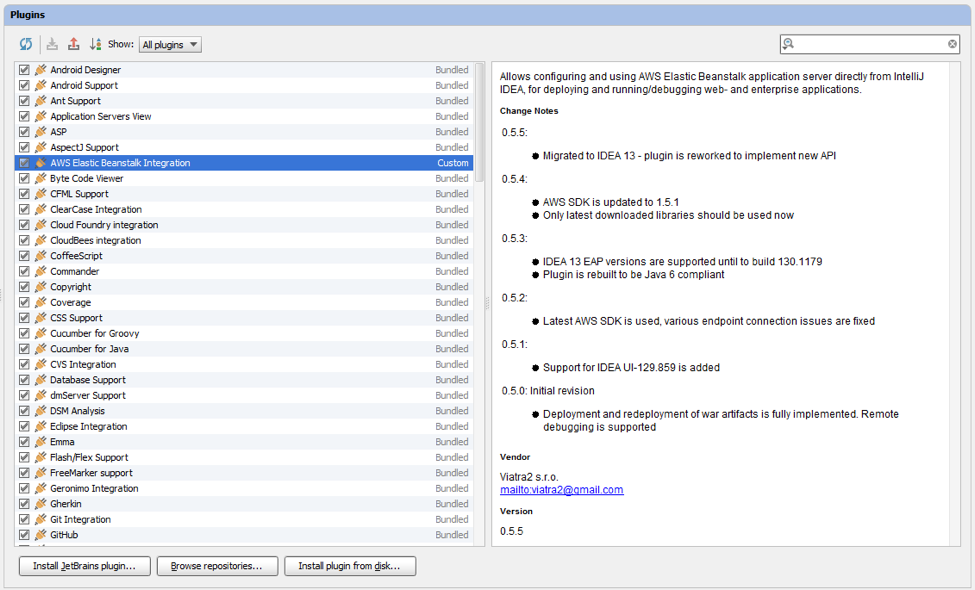
Installed plugin should appear in your plugins list like on screenshot below:
Cloud Credentials Setup
You need to create proper Application Server configuration:
Go to “Run” > “Edit Configuration”
Press “Add new configuration” and select “AWS ElasticBeanstalk Deployment”
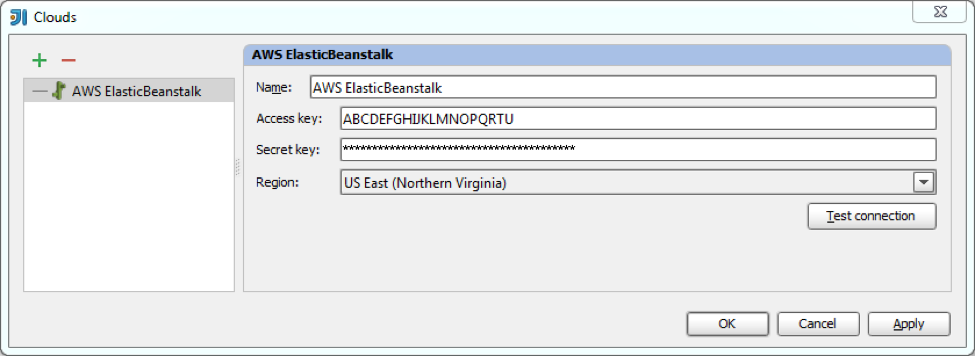
Press “…” button, clouds configuration window appears
Press “+” button and fill “Name”, “Access key” and “Secret key” fields. Security credendials can be obtained from AWS Account Security Credentials webpage.
Press “Test connection” button. All required libraries should be downloaded and you should see “Connection successful” message. If you see error messages - recheck correctness of your access and secret keys
If you want to deploy on particular AWS Region - select it in “Region” list Press “OK” and save your settings
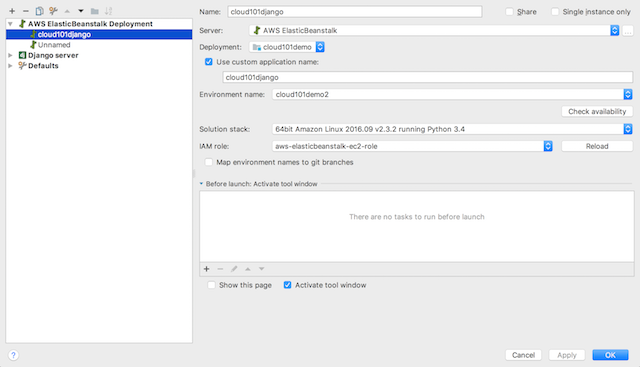
You will return to the previous window where you will fill in “Name”, “Application Name” and the “Environment Name”. Our solution stack will be “64-bit Amazon Linux 2016.v2.3.2 running Python 3.4” – This is the latest AMI and is necessary to ensure that your Django framework runs! Select “aws-elasticbeanstalk-ec2-role” for the IAM role. You may need to click on the “Reload” button to load the role.
You should now have a window that looks something like this:
Testing and Deployment Test your deployment locally first by clicking on drop down menu near the top right to select “Django Server”, next to “Run” button:

You can view your local deployment on the development server, http://127.0.0.1:8000/
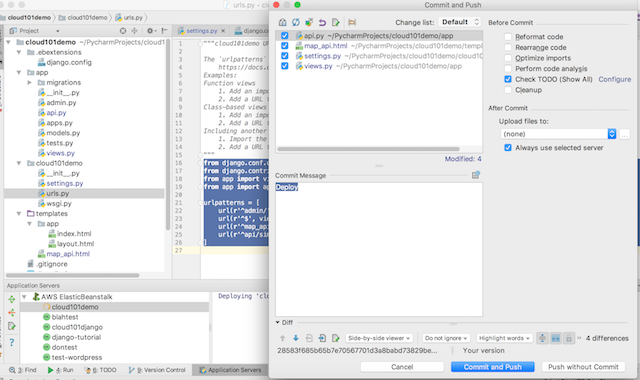
Next, from the same drop down menu, select the Beanstalk deployment. It should be named after the “Application Name” you input into the configuration earlier. When prompted, you should commit and push. This will store your code on your local git repository.
Key Points
Linking API calls and data visualization
You get the picture