Cloud 101: Introduction to AWS, Azure and Google Cloud
Introduction to Microsoft Azure, Blob Storage and Virtual Machines
Overview
Teaching: 0 min Exercises: 30 minQuestions
How do I launch a virtual machine in Microsoft Azure?
How do I use my virtual machine to transfer data to blob storage?
Objectives
Learn to provision an Azure Virtual Machine
Learn to create an Azure Blob Storage
Learn to transfer data from the Azure VM to Blob Storage
Prerequisites
- Sign up for a Microsoft Azure account
Launch an Azure Virtual Machine
This tutorial was adapted from https://docs.microsoft.com/en-us/azure/virtual-machines/windows/classic/tutorial
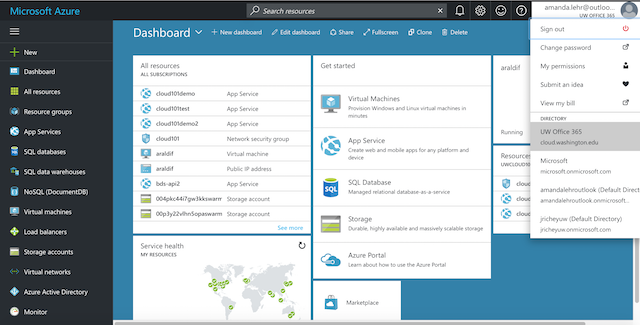
On the top right corner, make sure you have selected cloud.washington.edu as your Active Directory.
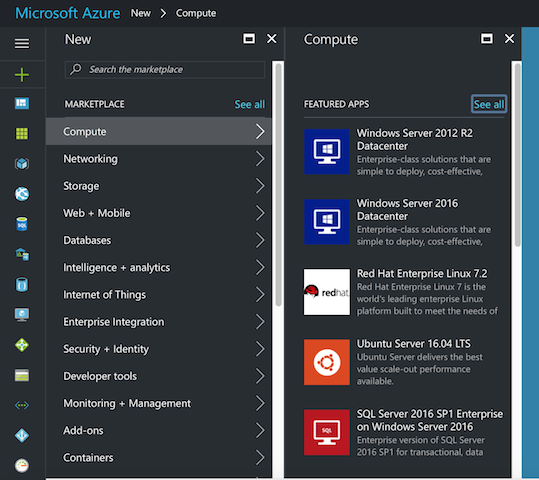
Virtual machine > Add > Search for “Ubuntu” > Ubuntu 16.04 LTS (long term support) > Deployment type: Resource Manager
You can fill in the relevant information. We are going to go with using a password to log in this time, but it is probably more secure to use ssh-keygen to generate and ssh key in the future.
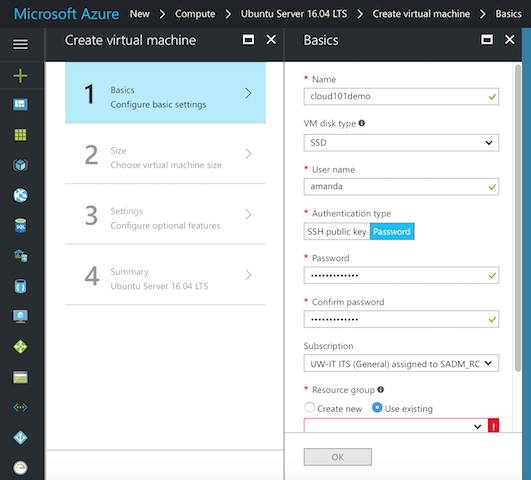
Under “Resource Group” choose “Use Existing” and select “uwcloud101”. You can leave the location as West US. Click OK.
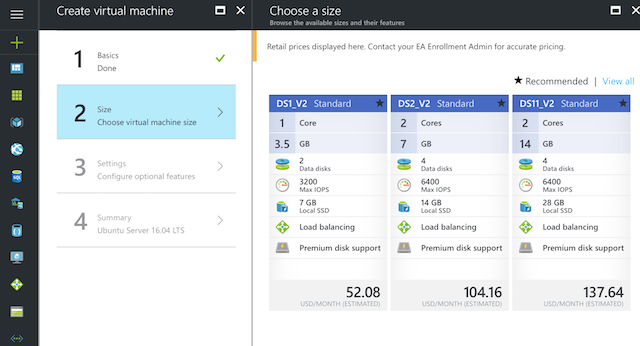
You will select the DS1_V2 machine and then click “Select”
You can leave the default options for the security settings, but click on Network Security Group (Firewall) to check that Port 22 is open.
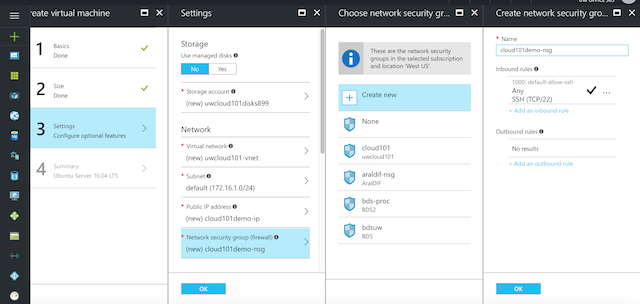
In the final step, you will see a summary page. Click “OK” to provision your machine.

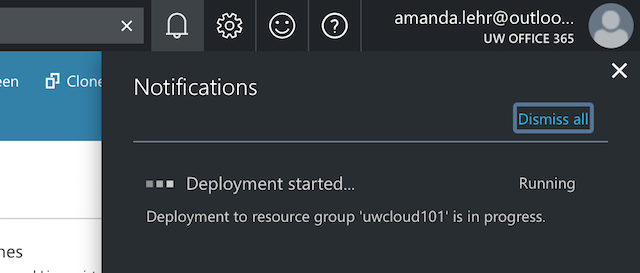
It may take a while to provision your machine – you can view the status on the top right corner of the portal by clicking on the bell icon.
Find your newly created Virtual Machine tab in the Portal and click on it view the configuration. You can also search for your VM by clicking on All Resources.
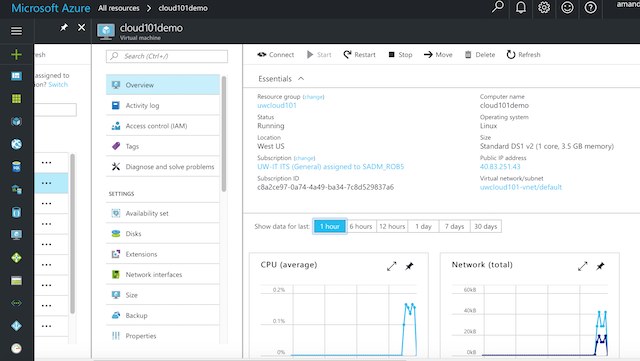
THIS IS A SHARED RESOURCE GROUP. PLEASE REMEMBER THE NAME OF YOUR APPS AND VIRTUAL MACHINE AND DO NOT MESS AROUND WITH OTHER PEOPLE’S MACHINES!!!
If you click on the newly created Virtual Machine tab in the portal, you can view the configuration. One of the neat things with Azure is that you can specify your own DNS label name. Remember to save your configuration after you have edited it.
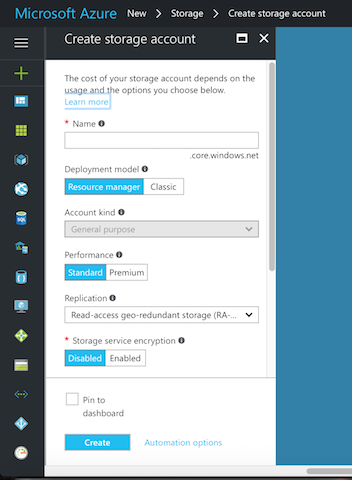
Create a blob storage
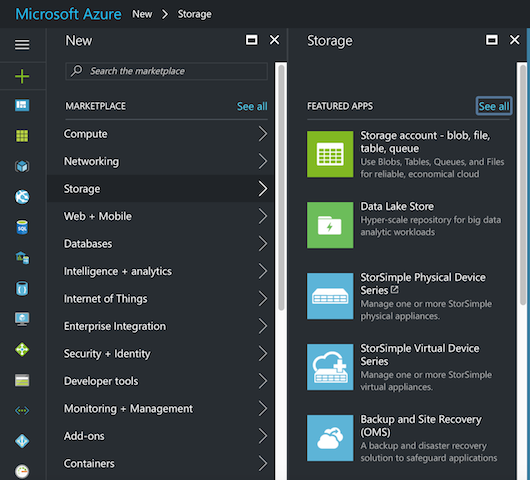
We will create an Azure storage account through the portal.
In the portal, click the ‘+’ sign for New > Storage > Storage Account
The Deployment model will be “Resource Manager”, the disk will be “Standard”, we don’t need Encrypted Storage for this tutorial and again, we will choose the existing Resource Group “uwcloud101”
It is important to understand the Data Replication options.
Downloading content to Blob Storage
Now we will ssh into your Azure VM and set up the necessary tools for connecting to blob storage. Similar to what we did with the AWS tutorial – we will ssh into the virtual machine and download and upload some files. This is necessary for the web frameworks tutorial.
This time we will ssh using the administrator name, IP Address and password we specified in the Azure VM configuration.
In your Terminal/Bash Shell:
$ ssh -X -Y amanda@40.175.685.25 #substitute amanda and IP with your own
$ sudo apt update
$ wget 'https://repo.continuum.io/miniconda/Miniconda3-latest-Linux-x86_64.sh'
$ bash Miniconda3-latest-Linux-x86_64.sh
$ source ~/.bashrc
$ pip install --user azure-cli
Working with the Azure CLI. Note that there are also other ways to get your files in and out of blob storage including the Azure Storage Explorer app, Visual Studio and the web portal. Here we will use only the Azure CLI and authenticate it through the browser.
$ az #to see all available options
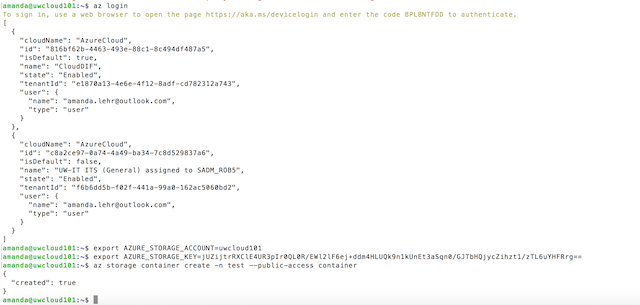
$ az login #This will allow you to authenticate your Azure CLI through the browser window
You should see something that looks like this:
We are going to write a quick bash script to copy all the objects from your AWS s3 bucket to Azure blob storage. The account name and storage access key should be on the Storage Account page on the portal.
Remember that you are creating this file on your virtual machine, so you should use the text editor on your virtual machine. Here, I’ll use vim, you can also use pico or nano.
We’ll first create a list of files to copy. Here we’ll use cat. Ctrl + C to exit the file.
$ cat > filenames.txt
Mean_Apr_ET.geojson
Mean_Aug_ET.geojson
Mean_Dec_ET.geojson
Mean_Feb_ET.geojson
Mean_Jan_ET.geojson
Mean_Jul_ET.geojson
Mean_Jun_ET.geojson
Mean_Mar_ET.geojson
Mean_May_ET.geojson
Mean_Nov_ET.geojson
Mean_Oct_ET.geojson
Mean_Sep_ET.geojson
$ vi blob_copy.sh
This is the script. Edit the configuration with your own parameters.
#!/bin/bash
# A simple Azure Storage example script

export AZURE_STORAGE_ACCOUNT=<storage_account_name>
export AZURE_STORAGE_ACCESS_KEY=<storage_account_key>

export container_name=<container_name>
export AWS_endpoint=<AWS_endpoint_url>

echo "Creating the container..."
az storage container create -n $container_name --public-access container

for fn in `cat filenames.txt`; do
echo "Uploading the file..."
az storage blob copy -u $AWS_endpoint/$fn -c $container_name -b $fn
done

echo "Listing the blobs..."
az storage blob list -c $container_name -o table # List the contents of container in table format. Default is json.

echo "Done"
Exit, change permissions on your script to allow it to run and then run it.
$ chmod +x blob_copy.sh
$ bash blob_copy.sh
You should now have something that looks like this:
![](/cloud101_cloudproviders/fig/02-azure-intro-0013.png
Key Points
We will build an Azure Virtual Machine
You get the picture